Sheetgo’s attendance management template is an automated system that allows you to track and monitor student attendance rates for multiple classes in your school.
It can be used by any school, college, or training center and offers teachers a simple and reliable way to take roll while providing administrators and managers with automated attendance records for every student and class.
How does the attendance management template work?
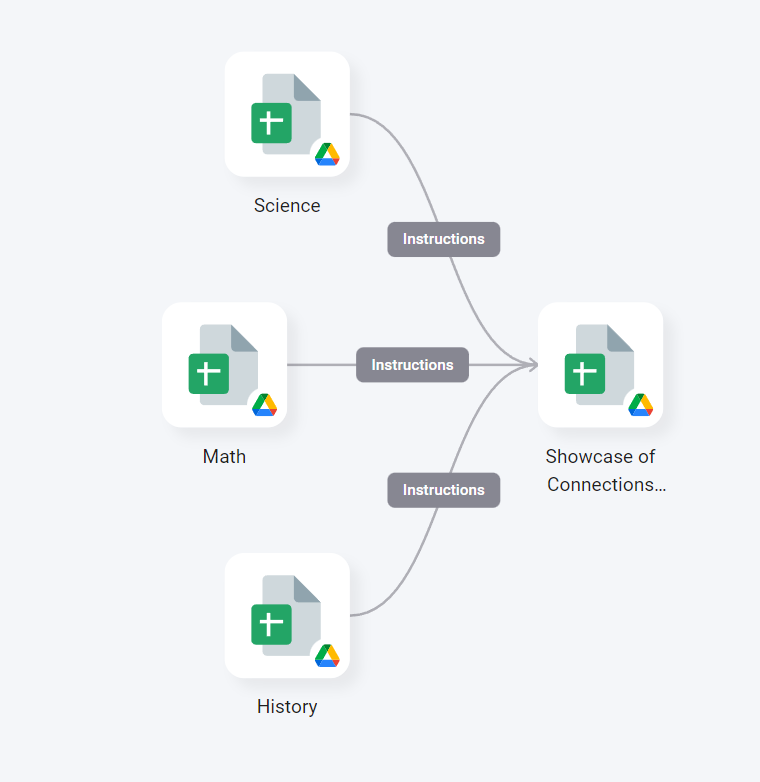
When you install the template, four Google Sheets files with pre-built Sheetgo connections are saved to your Google Drive:
Three Class spreadsheets. Make as many copies as you need for additional classes and share each file with the teacher. They will use the class spreadsheet to record students’ attendance (present, absent, excused, or tardy) for class.
One Attendance Management master sheet, for the school administrator or head of the department. Sheetgo connections pull data from the teachers’ Class spreadsheets directly into this file.

How to use the template?
Step 1: install and explore
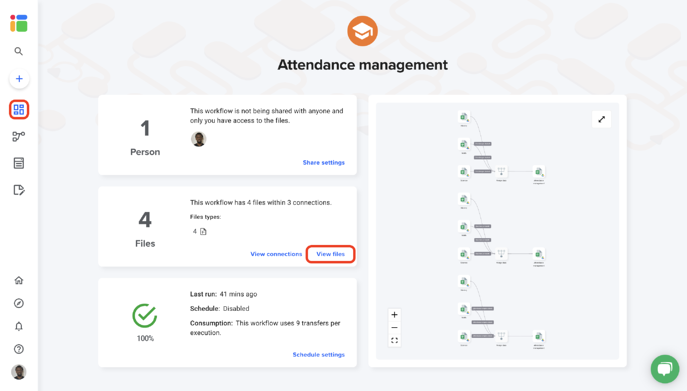
Allow a few minutes as Sheetgo saves a copy of the files to your Google Drive and creates the connections. Sheetgo will open the template on the network view.
- To explore the files connected to the template, go to the Overview and click View files to reveal the list of spreadsheets.

Step 2: enter your data
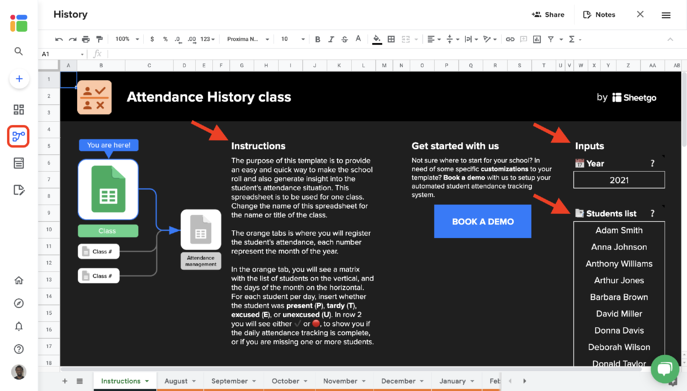
From the list of files, double click on one of the class sheets. This will open the spreadsheet in the Instructions tab. Read them and input the year and enter your Students list.

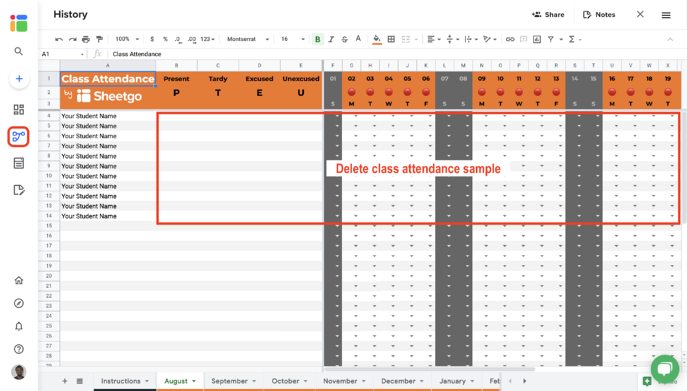
Open the first-month tab and delete all attendance sample entries. Make sure to keep column headers. See the next picture for reference.

Repeat these steps in the other month.
The next step is to share the class spreadsheets. Make sure to go through Step 2 with each class file or instruct teachers to follow the step from this tutorial.
During each class, the teacher can quickly take attendance directly inside their spreadsheet. Using the dropdown menu under each day, the teacher should select whether each student is present (P), tardy/late (T), excused or absent (E), or unexcused (U). Soon you will see how Sheetgo will merge attendance from each class into one master sheet.
Step 3: share files
To share any file that is connected to your workflow, read this article to learn how to seamlessly share files from your Google Drive.
You can also share this workflow to collaborate with another Sheetgo user. Learn how to share your workflow and collaborate with your colleagues in Sheetgo.
Step 4: update your connections
Step 5: automate transfers
Automate your workflow now to always have the most recent data in your master sheet. Sheetgo will run automatic transfer even when your machine is off. Learn more here.