Sheetgo’s project management template is a workflow template that enables you to:
Manage projects with multiple team members
Allocate tasks to colleagues without sharing the same file
Get automatic status updates in the central spreadsheet and dashboard
Upon installation, the template contains four documents with pre-built Sheetgo connections that allow you to send data back and forth automatically.
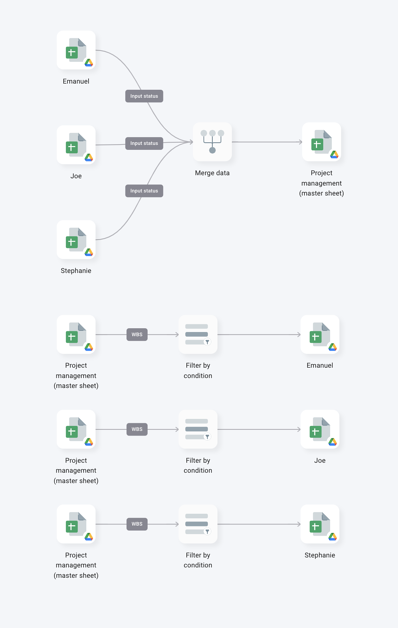
- Project management (master sheet)
This is the manager’s spreadsheet. Here you can plan projects, allocate tasks to colleagues, and track progress in the automated Gantt chart. When you add a new task for a colleague, it will be sent to their personal spreadsheet.
- “Stephanie”, “Emanuel” and “Joe”
These three spreadsheets are for your team members. Here they receive their list of tasks and log their progress. When a colleague updates the status of a task, data is sent back to the master sheet.
*
*
How to use the template
Step 1: Install and explore the template
Allow a few minutes as Sheetgo saves a copy of the files to your Google Drive and creates the connections. Sheetgo will open the template on the Overview view.
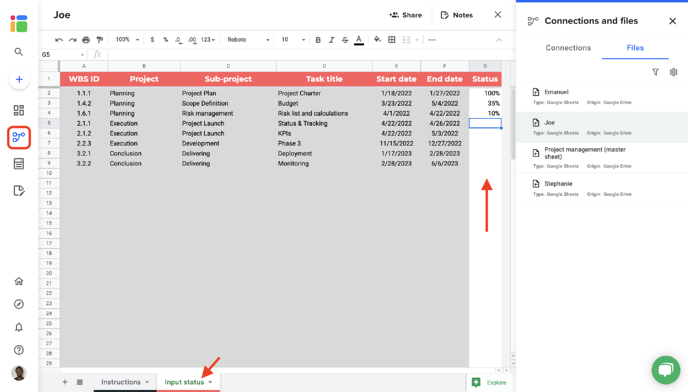
Click on the three horizontal lines (≡) in the top right-hand corner to show the sidebar menu.
Explore the files connected to the template. Click Files to reveal the list of spreadsheets. Find the Input status tab inside each project manager’s file and delete any data in column (G). Instruct your project manager to enter the status of their tasks in this column.
Step 2: Enter your project data
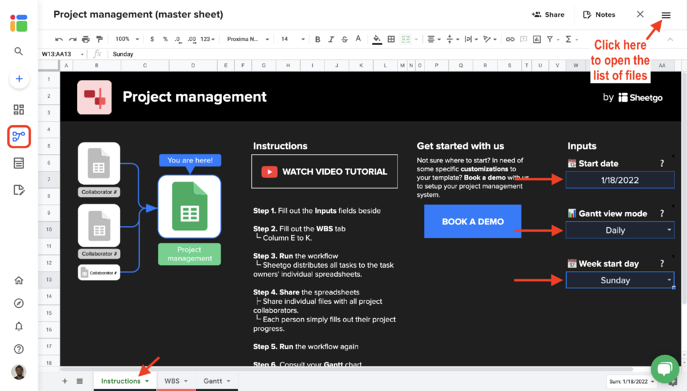
From the Workflow view, open the list of Files.
Double-click the Project management (master sheet).
In the Instructions tab of the master sheet, fill out the Inputs fields.
- Go to the WBS tab and replace the sample data:
- Column E to G: Projects and task descriptions.
- Column H to I: Decide the dependencies between tasks.
- Column J: Duration of the task.
- Column K: Person responsible for the task.
Note that you should only edit the white cells. The gray cells contain pre-written formulas and should not be edited.
What’s WBS?
WBS stands for Work Breakdown Structure. It’s a method for organizing a project in manageable, deliverable sections. The hierarchical, tree-like structure helps you break one big, overarching project down into smaller, achievable tasks.
In the WBS tab of the template, you can organize your project by Group > Subgroup > Task Title.
For example, the Group might be “Planning”. The Subgroup might be “Stakeholders”. And the Task Title might be “Create a list of stakeholders”.
How to change the WBS ID
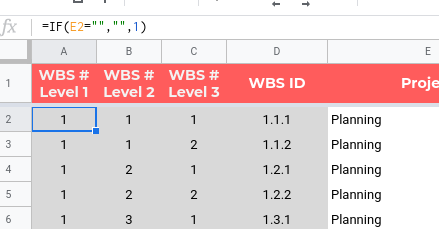
The template automatically generates a WBS ID code for each task in Column D. To change this,
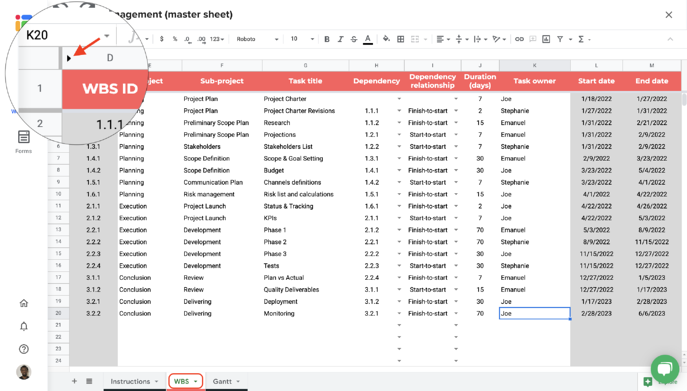
- Adjust the formulas in cells A1:C1 according to your preferences.
Dependency
This means whether a task must be carried out once another task has been started (Start-to-start) or when another task has been completed (Finish-to-start).
For example, let’s say that task 1.4.2 Planning > Scope Definition > Budget can only be carried out once task 1.2.2 Planning > Preliminary Scope Plan > Projections has been completed.
In this instance, you should use the dropdown menu in Column H (Dependency) to select 1.2.2 and in Column I (Dependency relationship) select Finish-to-start.
Step 3: Rename the team member spreadsheets and share
- Open your cloud storage folder and go to Sheetgo templates > Project Management.
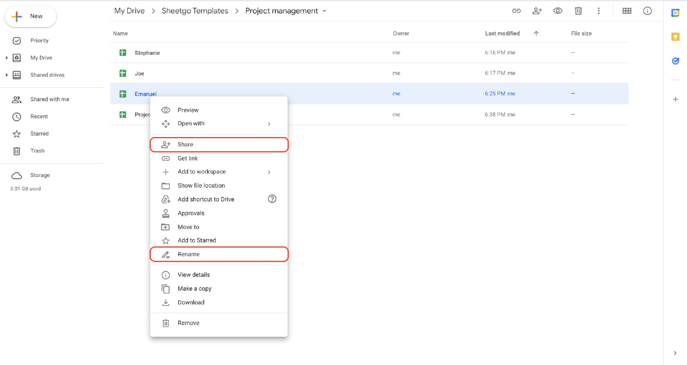
Right-click on the first file and rename it with the file responsible.
Right-click again and now share this file with the responsible.
Repeat these last steps with other project managers’ files.
Step 4: Update the connections
Your projects are now assigned to every project manager. It is time to transfer the tasks to your colleagues’ spreadsheets.
The name in the Owner column will determine which spreadsheet the task is sent to, so make sure that’s correct in column K of the WBS tab in the master sheet!
From the Workflow view, locate the menu bar and click Run. Learn more here.
Each project manager received the tasks in their personal file. They will use column G to update the progress of their task.
Step 5: Team members log their progress
To receive the progress status of each project, simply run the workflow again.
- Run the workflow and you’ll see that the data from each team member’s spreadsheet is sent back to the master sheet.
Step 6: Automate the workflow
To ensure that data flows back and forth without you having to open Sheetgo, schedule automatic updates. Learn how to set up automatic transfer here.