Sheetgo’s OKRs template is a system of connected Google Sheets files that allows you to set up an automated workflow in your company.
With this template, you can:
Monitor the targets and performance of multiple employees.
Give each team a private spreadsheet to log their OKRs.
Centralize data from all departments and employees in one place.
How does the template work?
When you install the OKRs template, 7 Google Sheets files with pre-built Sheetgo connections are saved to your Google Drive. The connections move data between the files for you automatically.
The template contains:
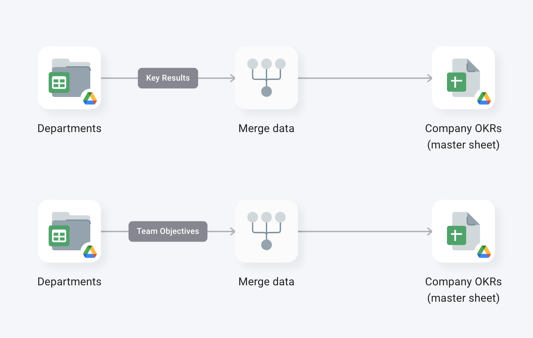
Six Department spreadsheets in a folder. Rename and share these files with each team and make as many copies as you need for additional departments. The team uses their file to set their objectives and key results and to update their progress individually.
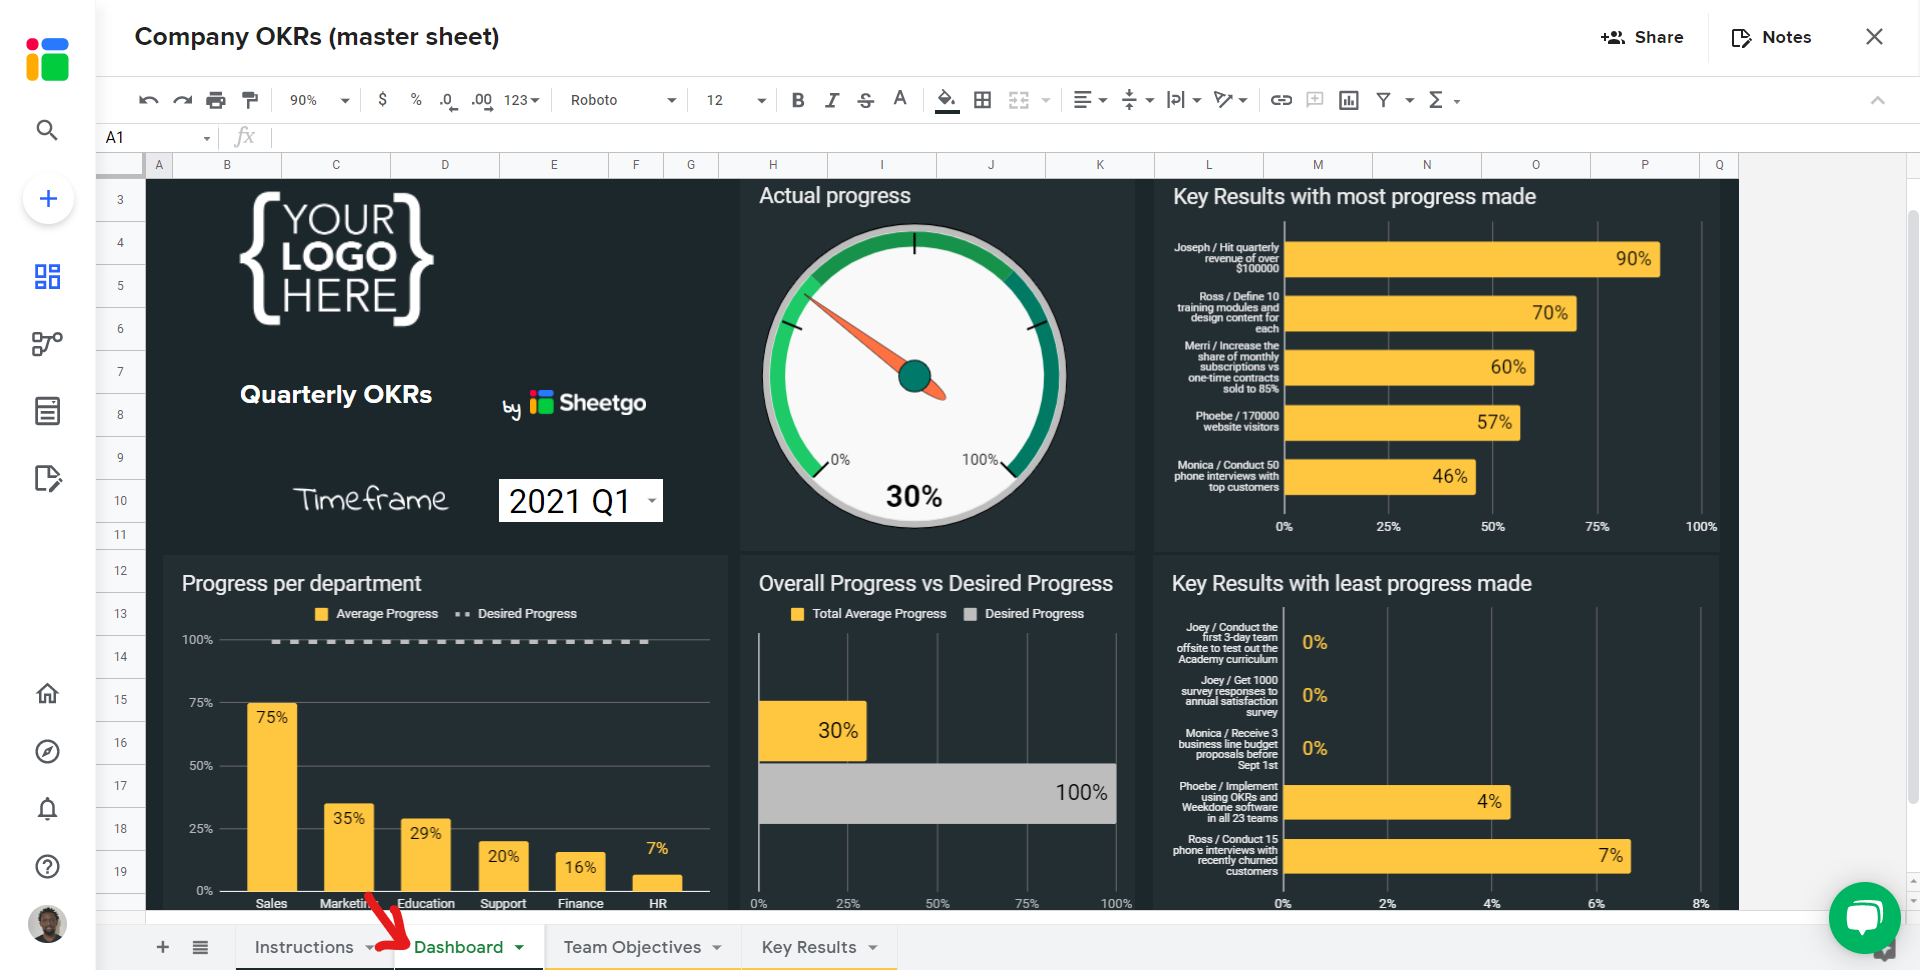
One Company OKRs master sheet for the manager(s). Data flows into this file from the Department spreadsheets, providing an overview of all team objectives and key results in tables and dashboard charts.
How to install the template?
Step 1: install and explore
*
Allow a few minutes as Sheetgo saves a copy of the files to your Google Drive and creates the connections. Sheetgo will open the template on the network view.
- To explore the files connected to the template, go to the Overview and click View files to reveal the list of spreadsheets.
Step 2: share files
To share any file that is connected to your workflow, read this article to learn how to seamlessly share files from your Google Drive.
You can also share this workflow to collaborate with another Sheetgo user. Learn how to share your workflow and collaborate with your colleagues in Sheetgo.
Step 3: enter your data
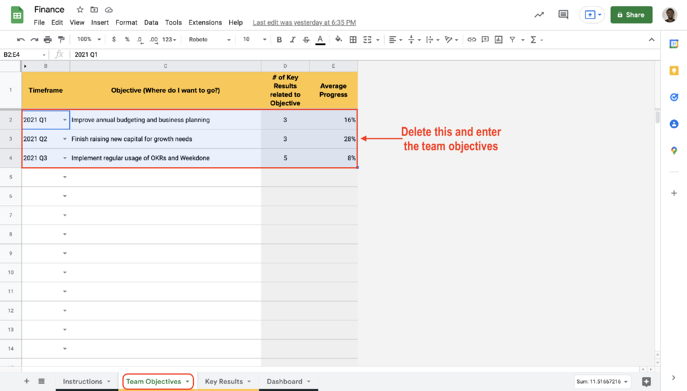
After each department has agreed on its objectives and results, they should enter them into the Team Objectives and Key results tab of their spreadsheet. Every file has an instructions tab where you and the team can learn how to enter the data in the required tabs.
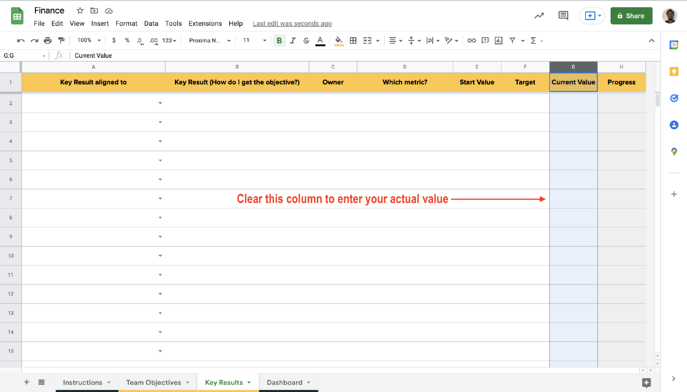
When your colleagues (either department managers or individual team members) start entering their progress towards their OKRs they should fill out Column G: Current Value in the Key Results tab.
Repeat the above steps with every department file.
Step 5: update your connections
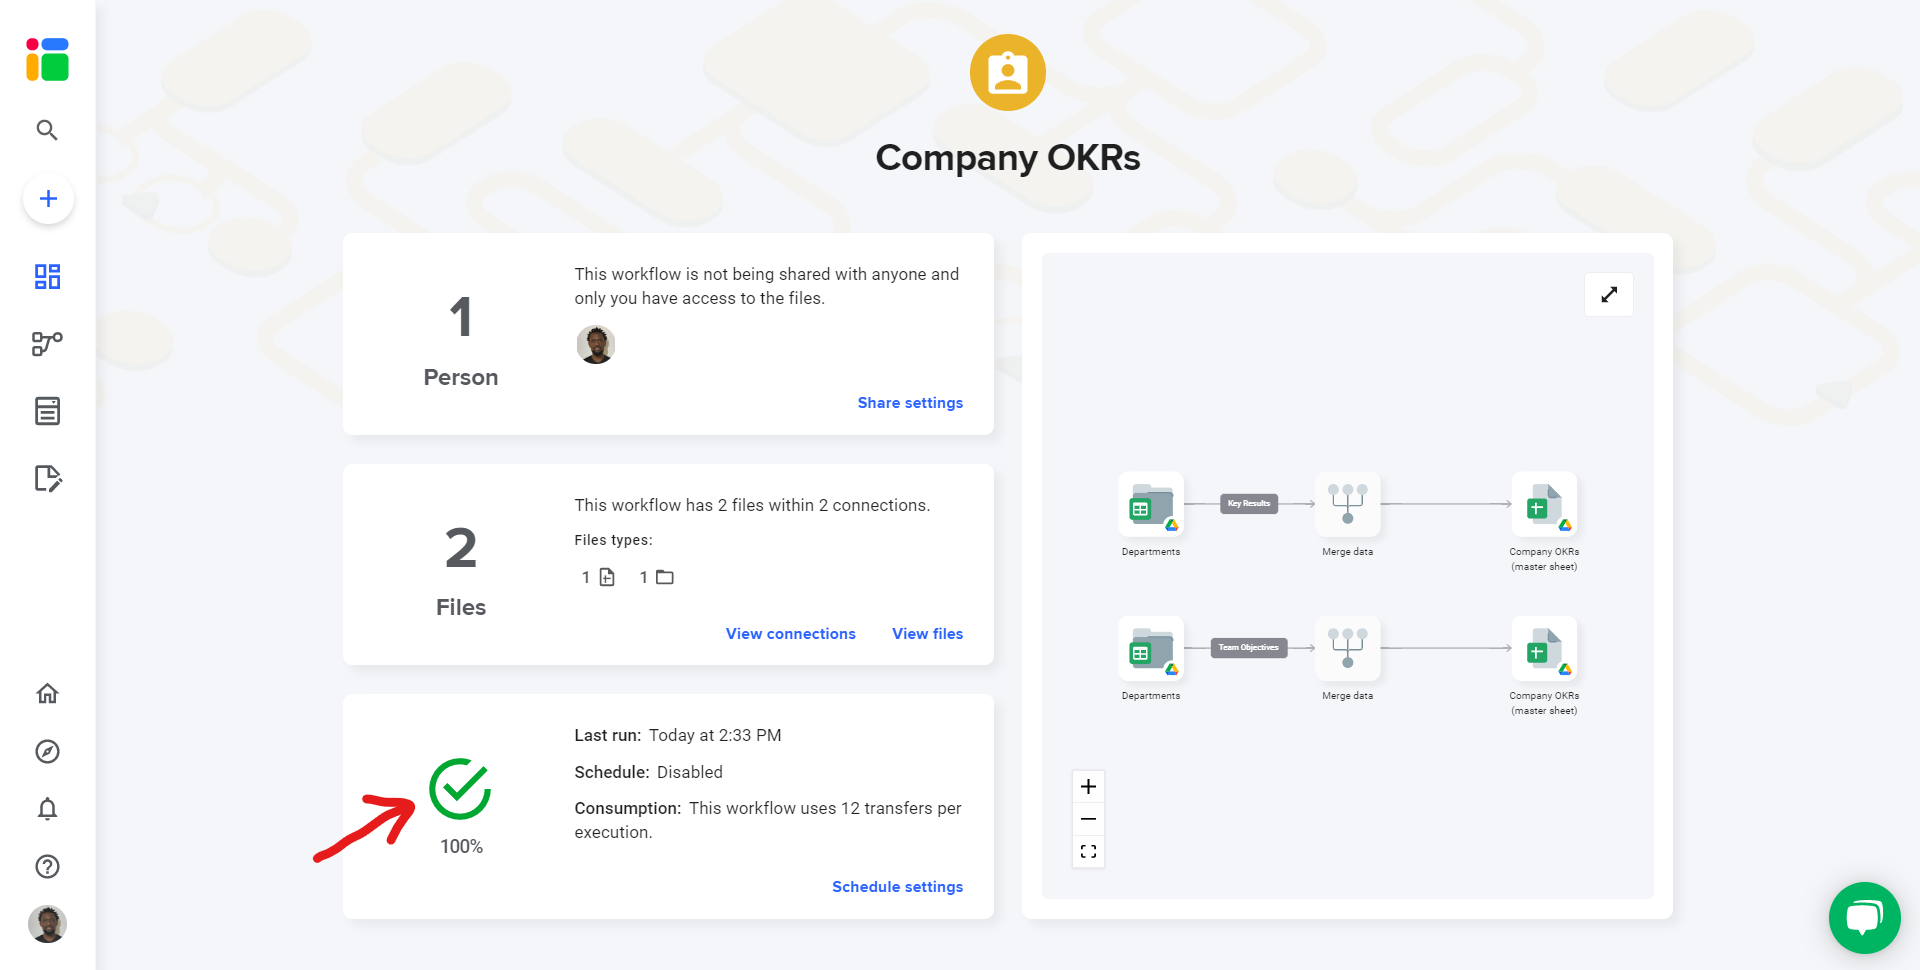
Go to the Overview and click the run button to update your workflow.
Go to the list of files and open the master sheet. Every time Sheetgo workflow will run, it will copy data from each department file in the master sheet. From the Dashboard tab, you can see the objectives vs results progression so far.
Step 6: automate transfers
Automate your workflow now to always have the most recent data in your master sheet. Sheetgo will run automatic transfer even when your machine is off. Learn more here.