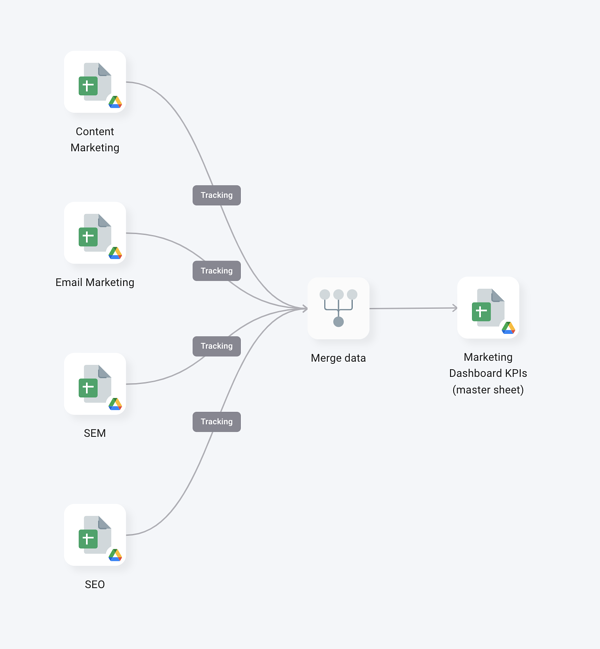
This template is ideal for marketing teams who need to track multiple marketing channels. It allows you to set up an automated workflow that combines data from multiple spreadsheets into one central KPI dashboard automatically.
How the Marketing KPIs template works
When you install the template, five Google Sheets files with pre-built Sheetgo connections are saved to your Google Drive:
Four Marketing channel spreadsheets. These are named SEO, Content Marketing, SEM, and Email Marketing but you can rename them and use them for other channels. Simply share these files with the team members responsible for managing this data. Each team uses their copy of this spreadsheet to enter their channel’s main metrics.
One Marketing Dashboard KPIs master spreadsheet for the marketing manager. Data from the four Marketing channel files flows into this spreadsheet, providing you with an automated analysis of all your key marketing metrics in the dashboard.

How to use the template?
Step 1: install and explore
If you haven’t done so already, install the Marketing KPIs template.
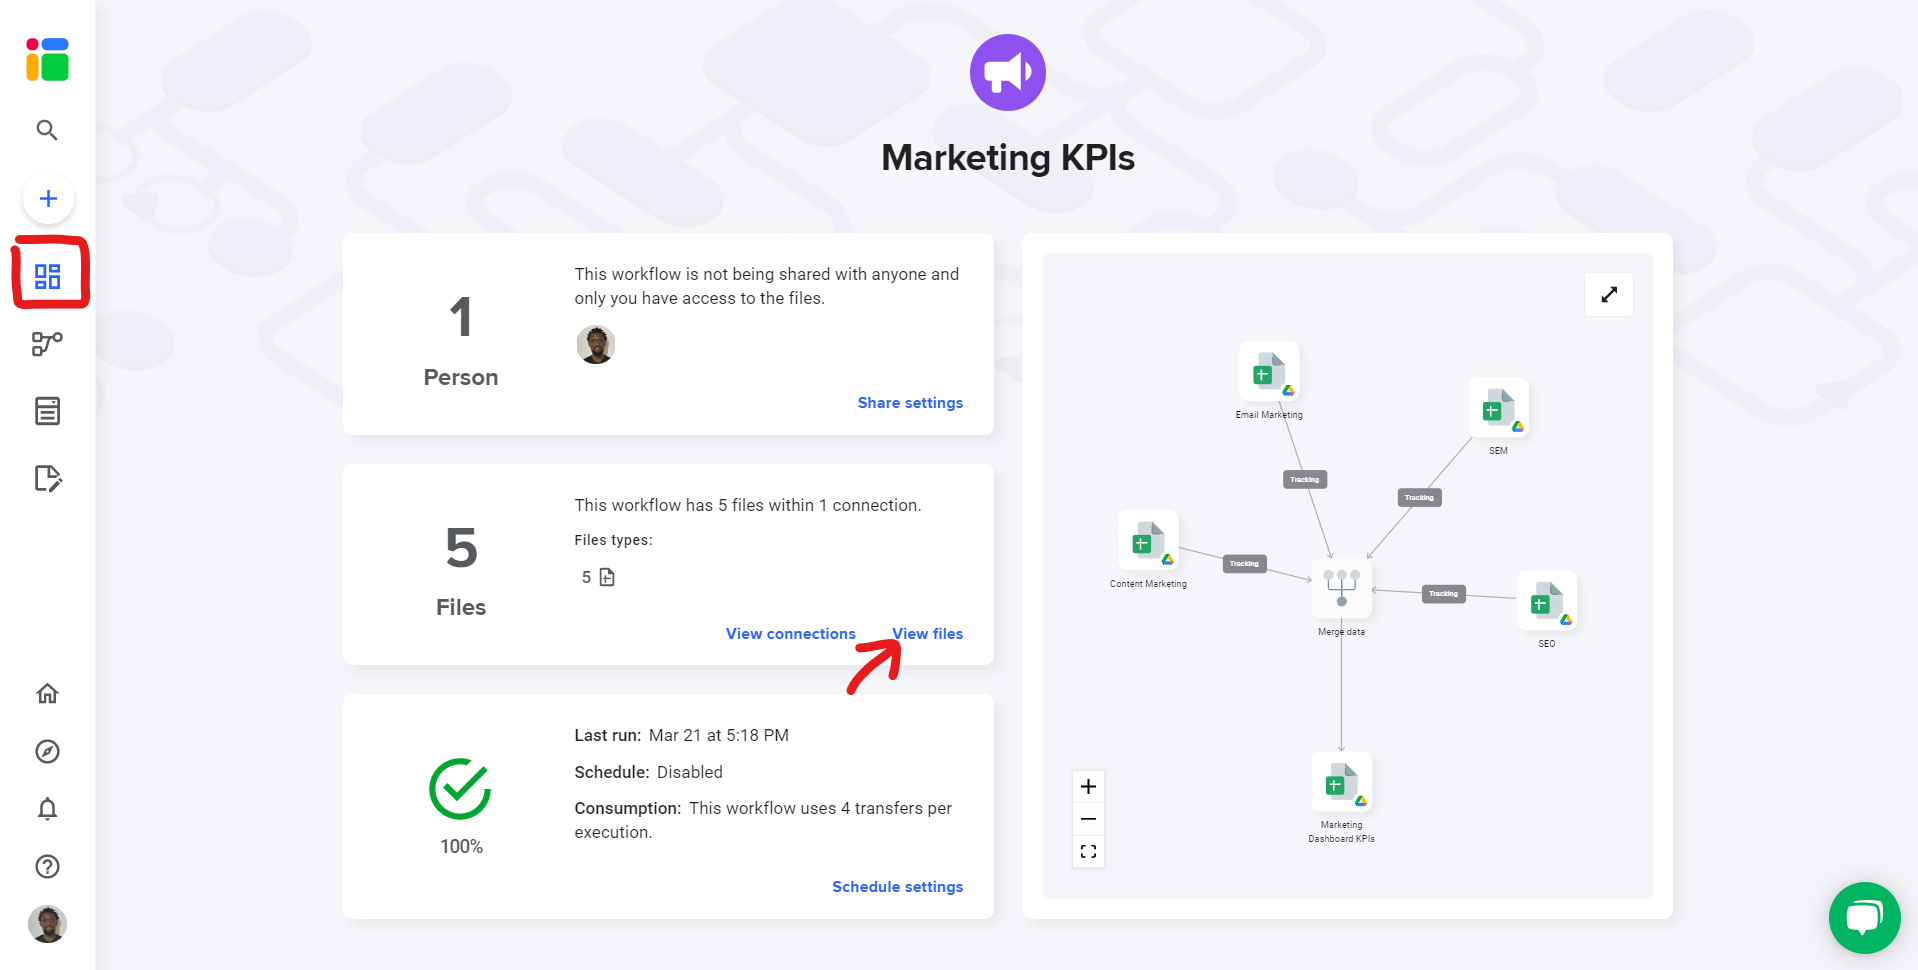
Wait a few moments while Sheetgo creates the connections and saves a copy of the files to your Google Drive.
Click on View files to see the list of spreadsheets that are connected to the templates. Explore them, see how each of them has an Instructions tab to help you or your colleague understand how to use it.

Step 2: share files
To share any file that is connected to your workflow, read this article to learn how to seamlessly share files from your Google Drive.
You can also share this workflow to collaborate with another Sheetgo user. Learn how to share your workflow and collaborate with your colleagues in Sheetgo.
Repeat these steps with the other input files if needed.
*
Step 3: enter your data
Once you have shared the spreadsheets with your co-workers, they can start entering data.
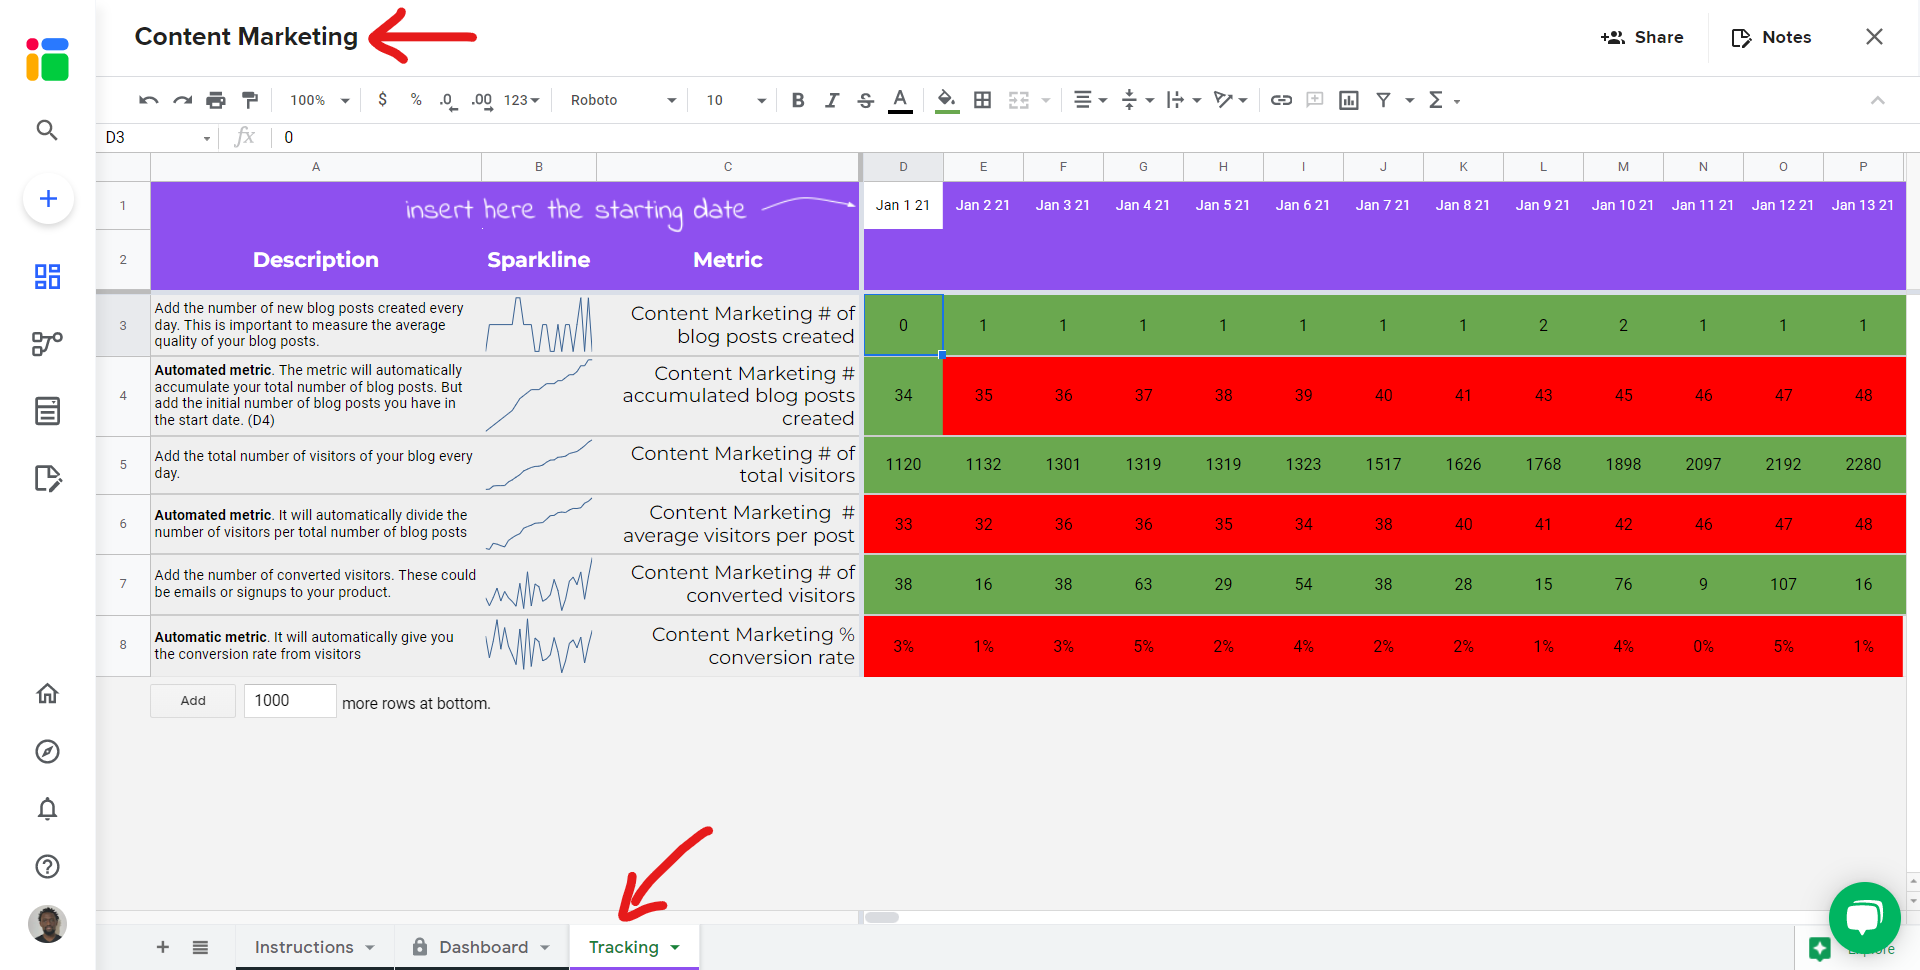
Each spreadsheet (SEO, SEM, Email Marketing, or Content Marketing) contains sample data in the Tracking tab.
Simply select and delete this sample data and replace it with your own. In this tutorial, the fields that contain data to not change are in red while the fields with data to delete and replace with your own are in green. When you install the template, the red fields are light gray and the green fields are white.
Resuming, do not change fields with a gray background color in your spreadsheet as these contain formulas that automate metrics. This applies to all the input spreadsheets. In the screenshot below, the gray field has been changed to red.

Tip: Try using Google Sheets add-ons such as Search Analytics for Sheets to import data from Google Analytics and other marketing platforms directly into your spreadsheets.
Step 4: update your connections
Once your colleagues have started entering data into their spreadsheets, you can import that information into the central master sheet of the workflow.
This will update all the connections in the workflow and copy-paste the latest data from the input sheets into the master sheet.
Step 5: automate transfers
Automate your workflow now to always have the most recent data into your master sheet. Sheetgo will run automatic transfer even when your machine is off. Learn more here.