The Invoice generator contains two files and three pre-set forms that will allow you to submit data to the master sheet or Invoice generator database.
How does the template work?
It is very simple to understand how this workflow works. Sheetgo uses a Google Doc template and Google Sheets to automatically generate invoices for your clients who can also receive them by email.
With the Invoice generator you can do the following:
Step 1: Install and explore
If you haven’t already done so, install the template.
Allow a few moments while Sheetgo creates the connection and saves a copy of the template files to your Google Drive. During this installation, Sheetgo will also create a folder where you will find copies of all invoices in Google Docs and PDF.
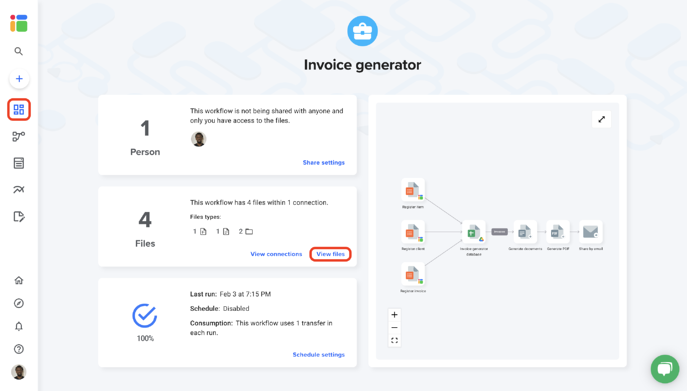
Sheetgo opens automatically the workflow on the Overview. Click View files to reveal all the folders and files connected in this workflow.
Step 2: Open the Invoice generator database file
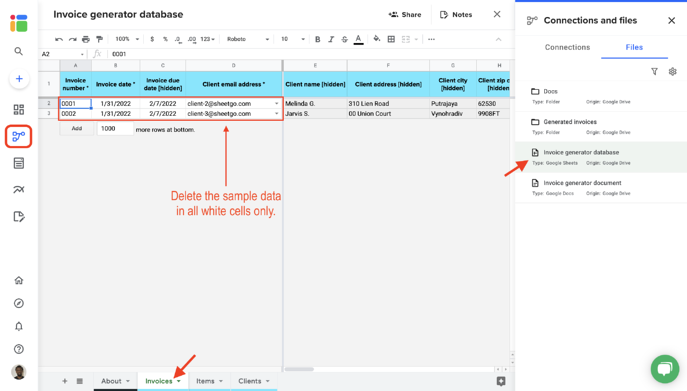
From the list on the right-hand side of the screen, double click the generator database.
The first tab is the instruction tab. The last three tabs are where you will find the list of clients, the inventory of items, and the invoice database.
Step 3: Input data in the database with forms
From the menu bar on the left-hand side of the screen, click the Forms icon.
Click on Register item form
Enter the item description
Submit this entry and verify that it appears in the Items tab in your database file
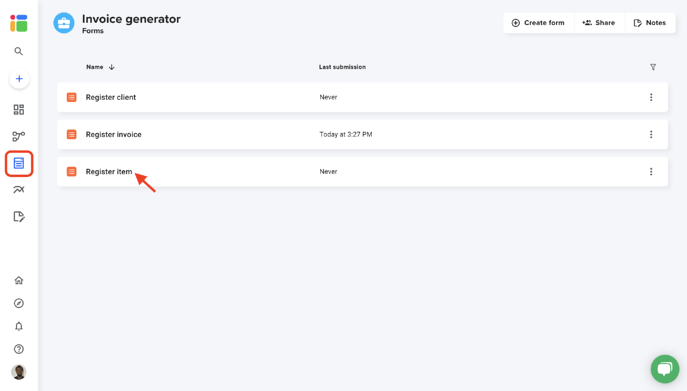
Use the Register client and Register invoice form to submit data in the Clients and Invoices tab respectively.
Step 4: Customize Invoice document
This is the Doc template that Sheetgo will use to generate your invoice in PDF. Insert your company logo and business details.
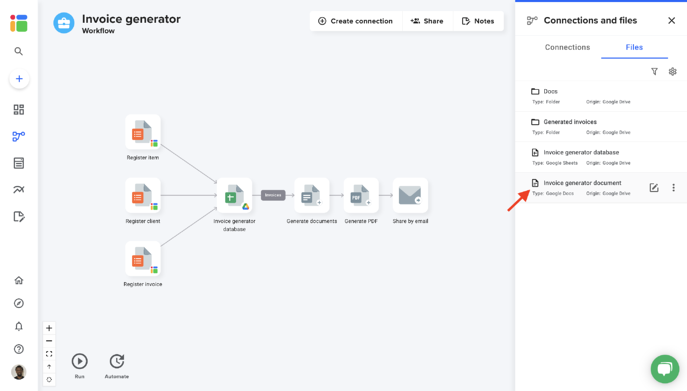
Sheetgo will replace the variable placeholders {{example}} with specific data from the Invoice generator database. Don’t change the text between the double curly brackets.
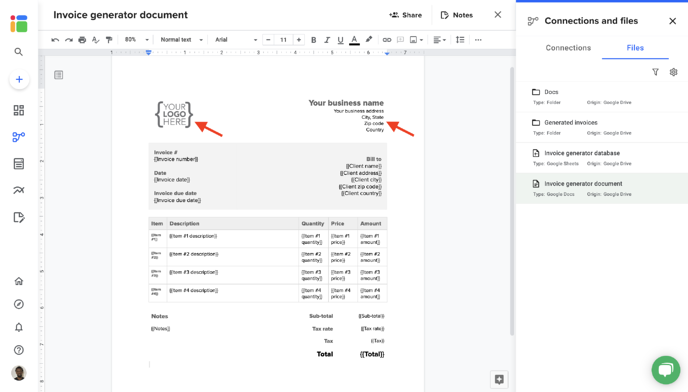
At this stage, your workflow should have a list of items, a list of clients, the Doc template should also be designed for your business and maybe you are ready to start generating invoices.
Step 5: Run the workflow
There are three ways to run the entire workflow because of the single connection that exists in this system.
From the Overview, click the blue circle with a checkmark in the middle
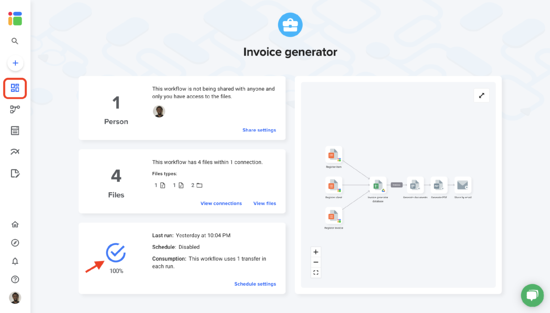
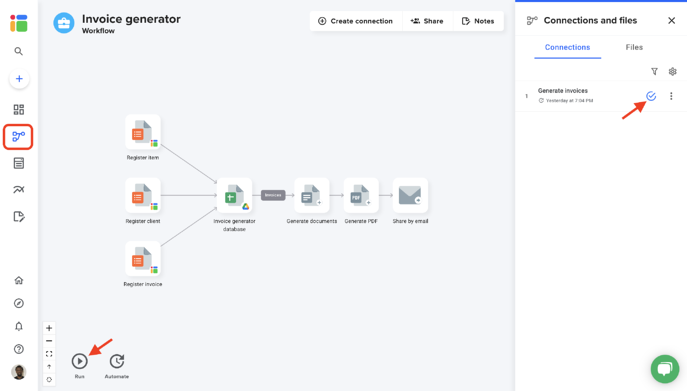
From the Workflow view, next to the connection click the blue circle with the checkmark, or
Click the Run button located at the bottom of the page, left-hand corner
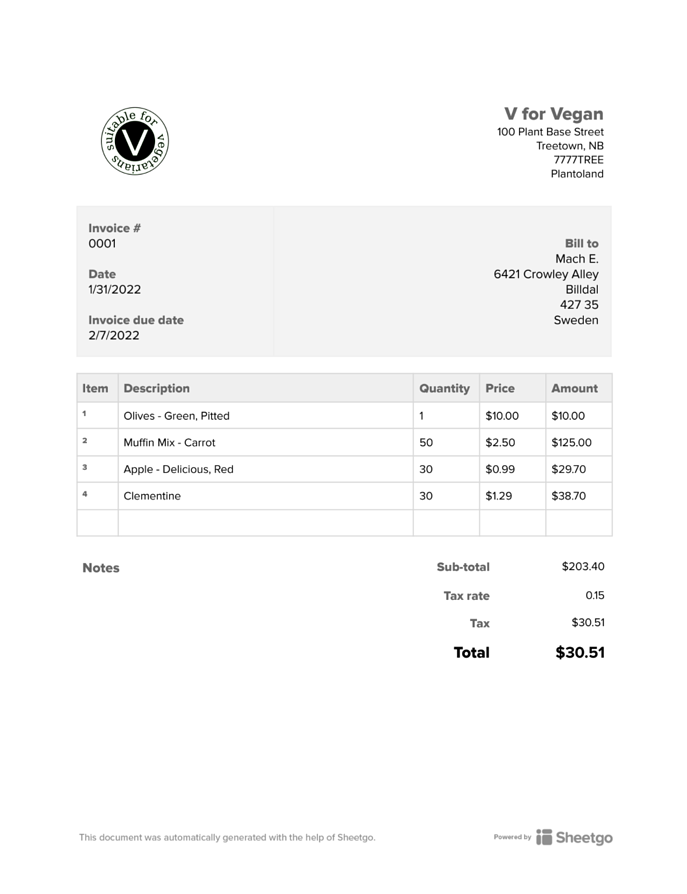
This workflow will install with the generator checker feature activated. It means that Sheetgo will track invoices that have already been generated then generate only new documents during the next workflow update.
Step 5: Automate
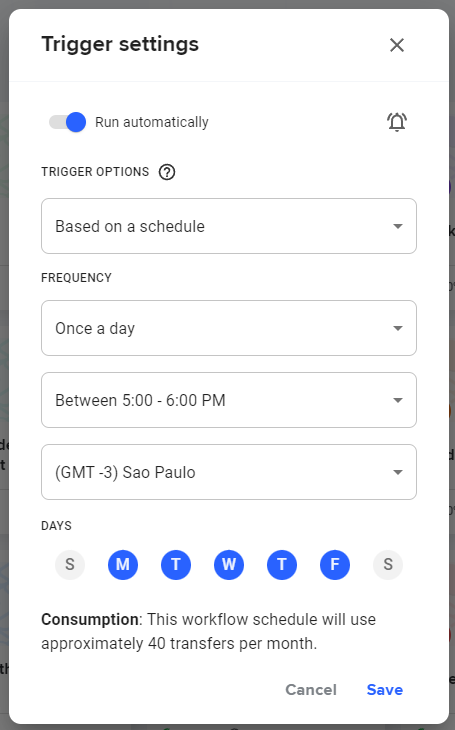
Automate this workflow to schedule when your invoices will be sent to your clients. Whether you want to send invoices to your clients monthly, weekly or daily, you can schedule this with Sheetgo.
On the menu bar, click Automate and select how often you want to generate invoices.
Select Update automatically by sliding the bar to the right.
Choose when and how often you want the workflow to run.
Select your preferred time window and your time zone.
Save your changes when ready and your workflow will now automatically update.
All done! Congratulations on setting up your automated Invoice generator system!