Sheetgo’s employee timesheet management template is a system of connected files that functions as an automated workflow to manage how many hours your team members have worked.
This template enables you to:
Give staff an easy way to log their hours and breaks.
Centralize employees’ timesheets in a single place.
Measure the working hours of your team.
How does the template work?
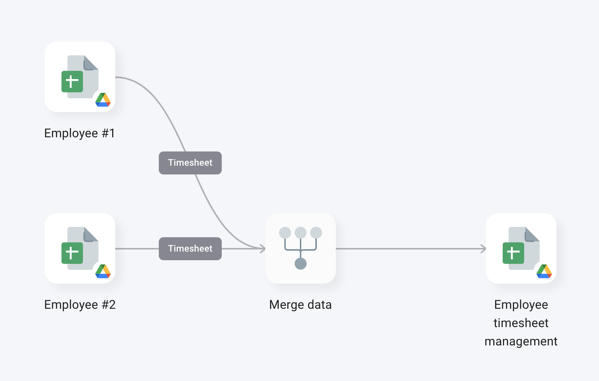
When you install the Sheetgo Employee Timesheet template, three Google Sheets files with pre-built Sheetgo connections are saved to your Google Drive:
Two Employee spreadsheets. Each employee uses their personal file to record the hours they work.
One Employee Timesheet Management master sheet for the HR manager. Data flows into this file from the Employee spreadsheets, providing a summary of everyone’s working hours in automated dashboard charts.
How do I use the template?
Step 1: install and explore
Allow a few minutes as Sheetgo saves a copy of the files to your Google Drive and creates the connections. Sheetgo will open the template on the network view.
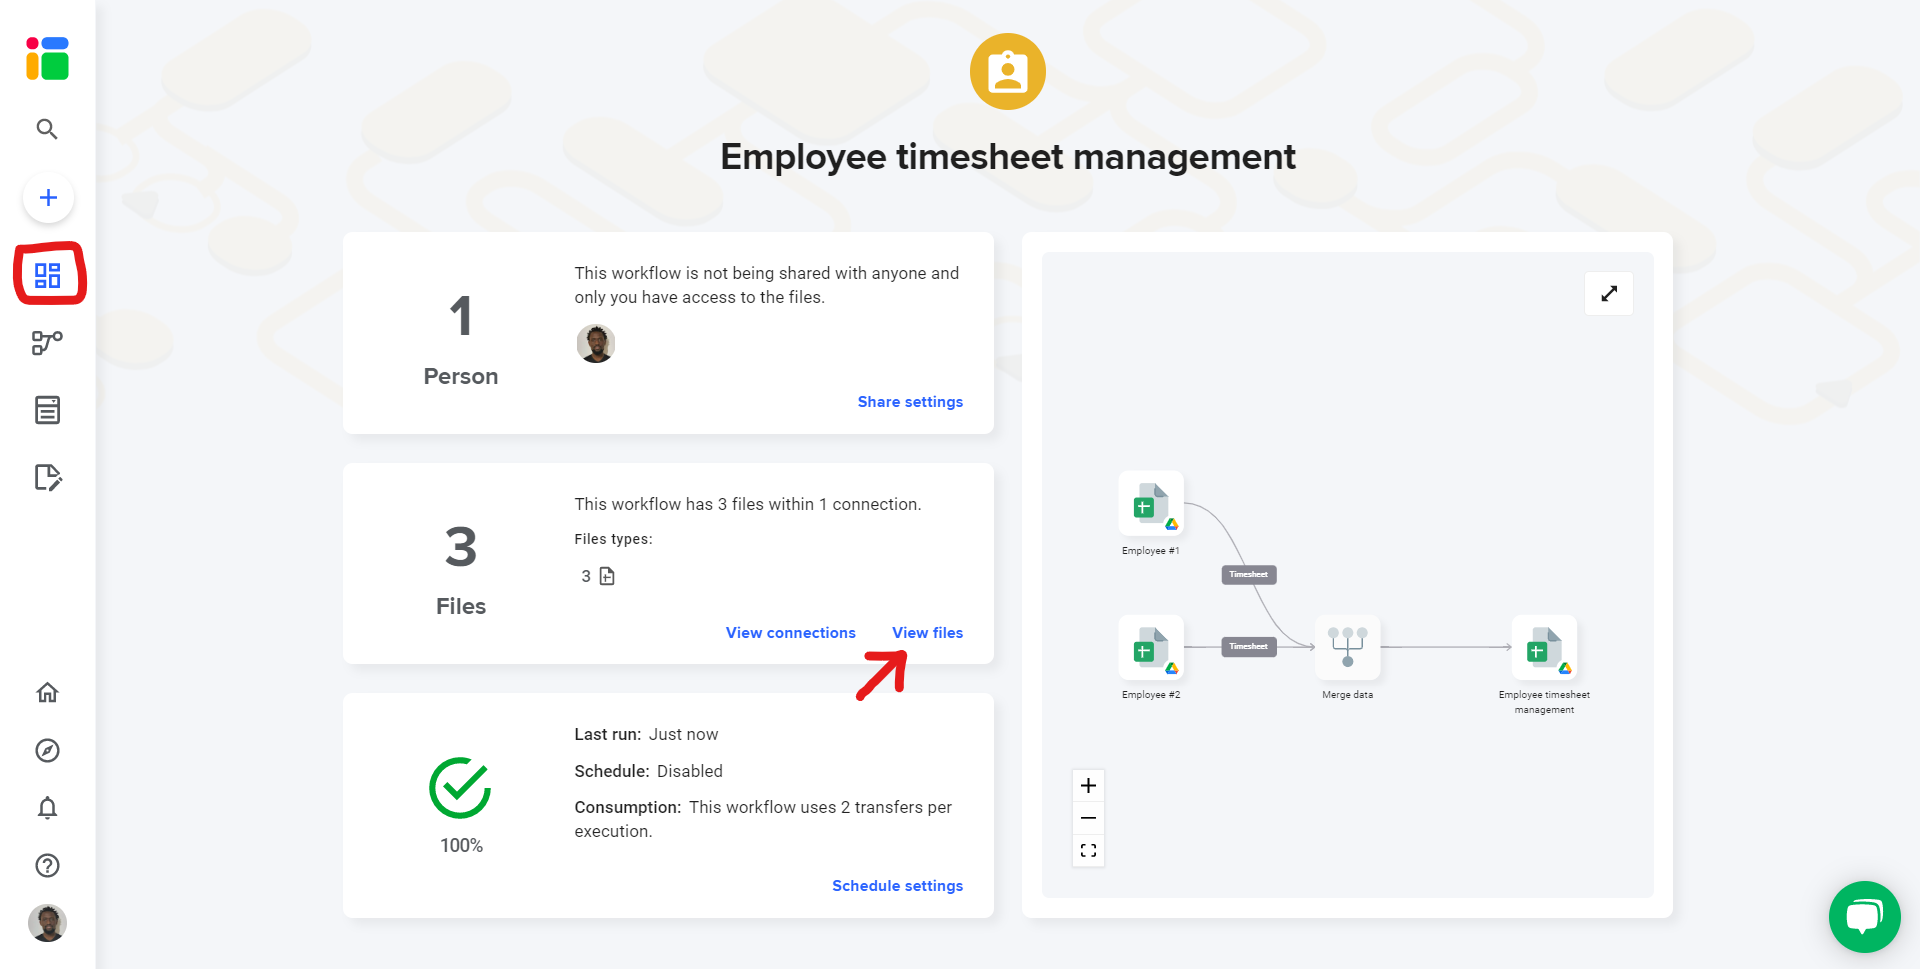
- To explore the files connected to the template, go to the Overview and click View files to reveal the list of spreadsheets.
 Step 2: enter your data
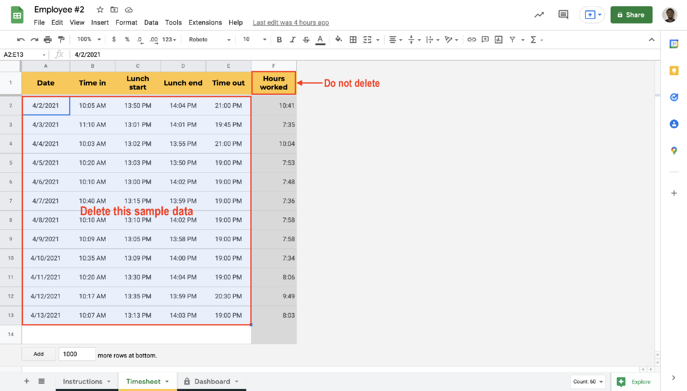
Every employee file comes with an Instruction tab where you will learn how to utilize it. Before sharing each file with the person who will record data, clear the sample data inside the file or share the file but make sure the receiver clears it before your workflow began pulling data from the input file.
Rename each spreadsheet yourself or let the person responsible for the spreadsheet change it to their name.
Step 3: share files
To share any file that is connected to your workflow, read this article to learn how to seamlessly share files from your Google Drive.
You can also share this workflow to collaborate with another Sheetgo user. Learn how to share your workflow and collaborate with your colleagues in Sheetgo.
Step 4: update your connections
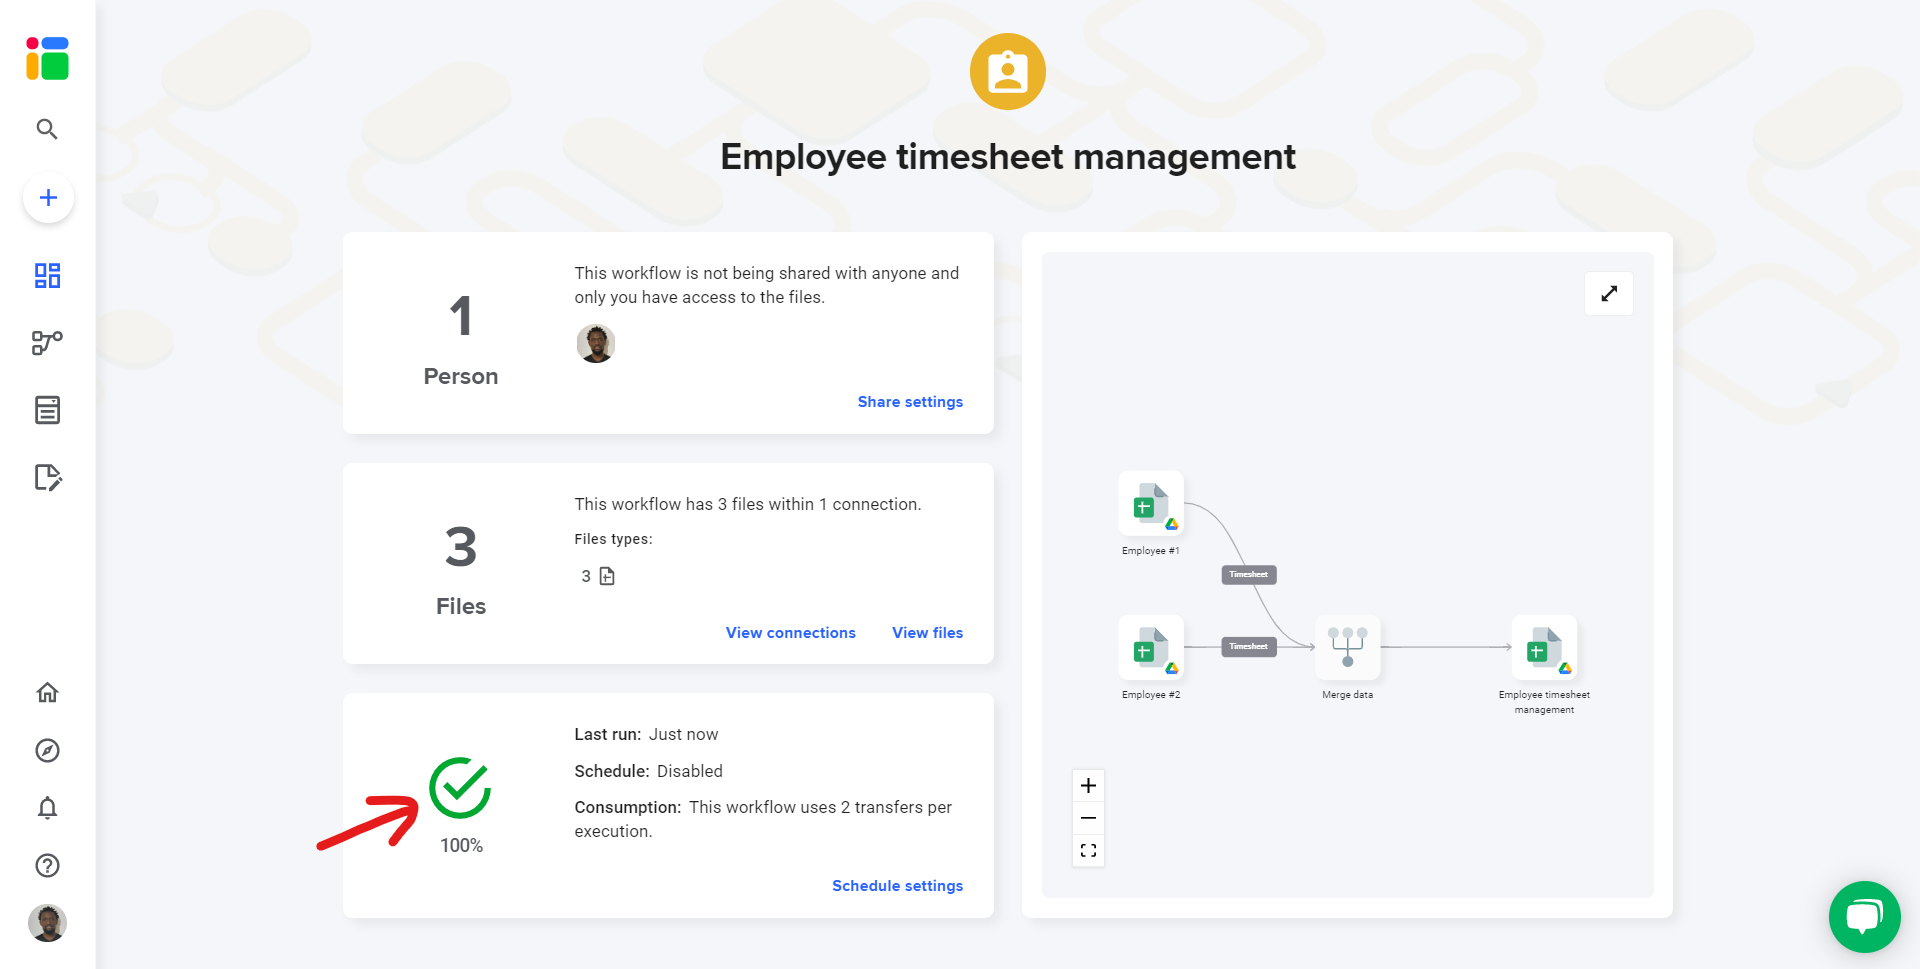
Go to the Overview and click the run button to update your workflow.
Open the master sheet in the All Timesheet Reports tab to see how Sheetgo has copied data from every employee timesheet or see the pre-built dashboard where you can select the time frame you want to analyze reported hours.
Step 5: automate transfers
Automate your workflow now to always have the most recent data in your master sheet. Sheetgo will run automatic transfer even when your machine is off. Learn more here.
How to add extra employee sheets
Once your automated employee timesheet system is up and running, it’s easy to add or delete Employee spreadsheets.
To add an extra employee spreadsheet to your workflow, go to your Google Drive.
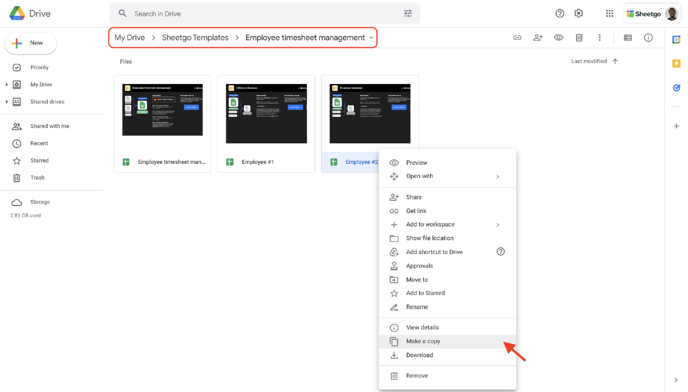
- In Google Drive > Sheetgo Templates > Employee timesheet management you will find the 2 Employee spreadsheets and the master sheet that are included in the template.
To duplicate one of these Employee sheets, right-click > Make a copy. You can rename this file to Employee #3 or enter the name of the employee who will use it.
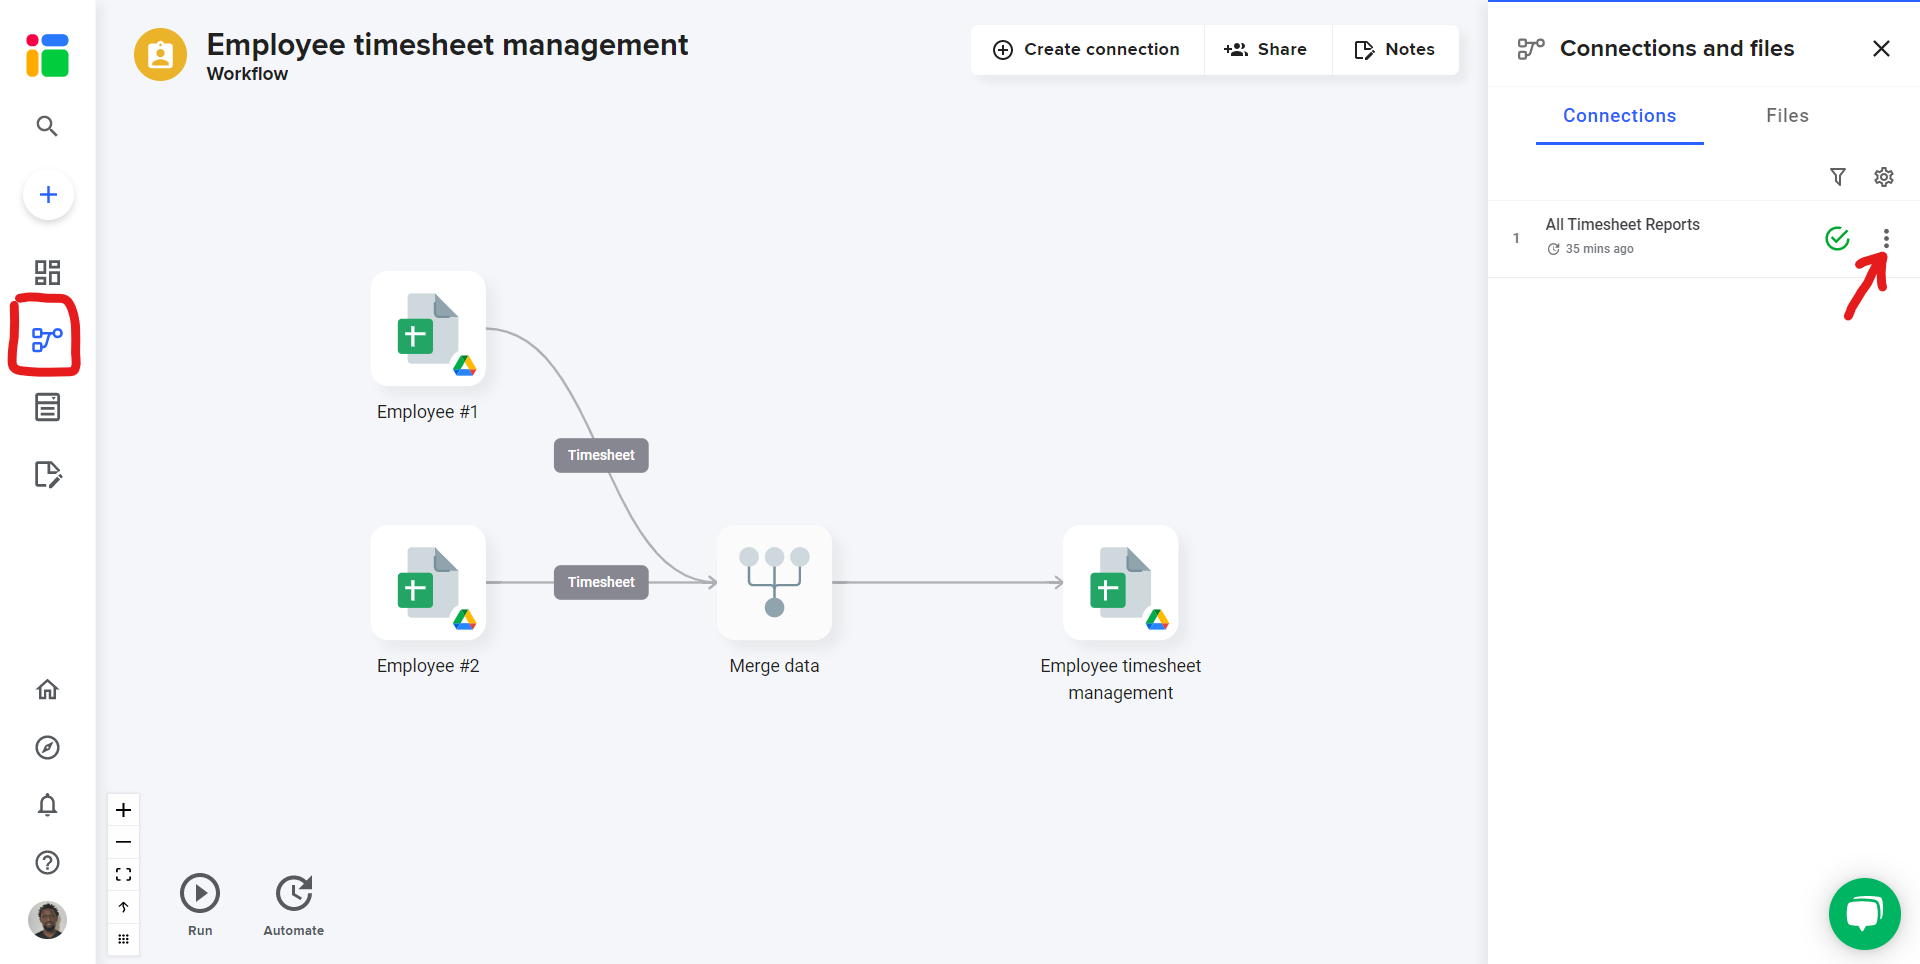
Inside Sheetgo, open the Employee Timesheet management workflow and go to Workflow view.
Next to the connection All Timesheet Reports, click on the 3-dots menu (⋮) and select Edit.
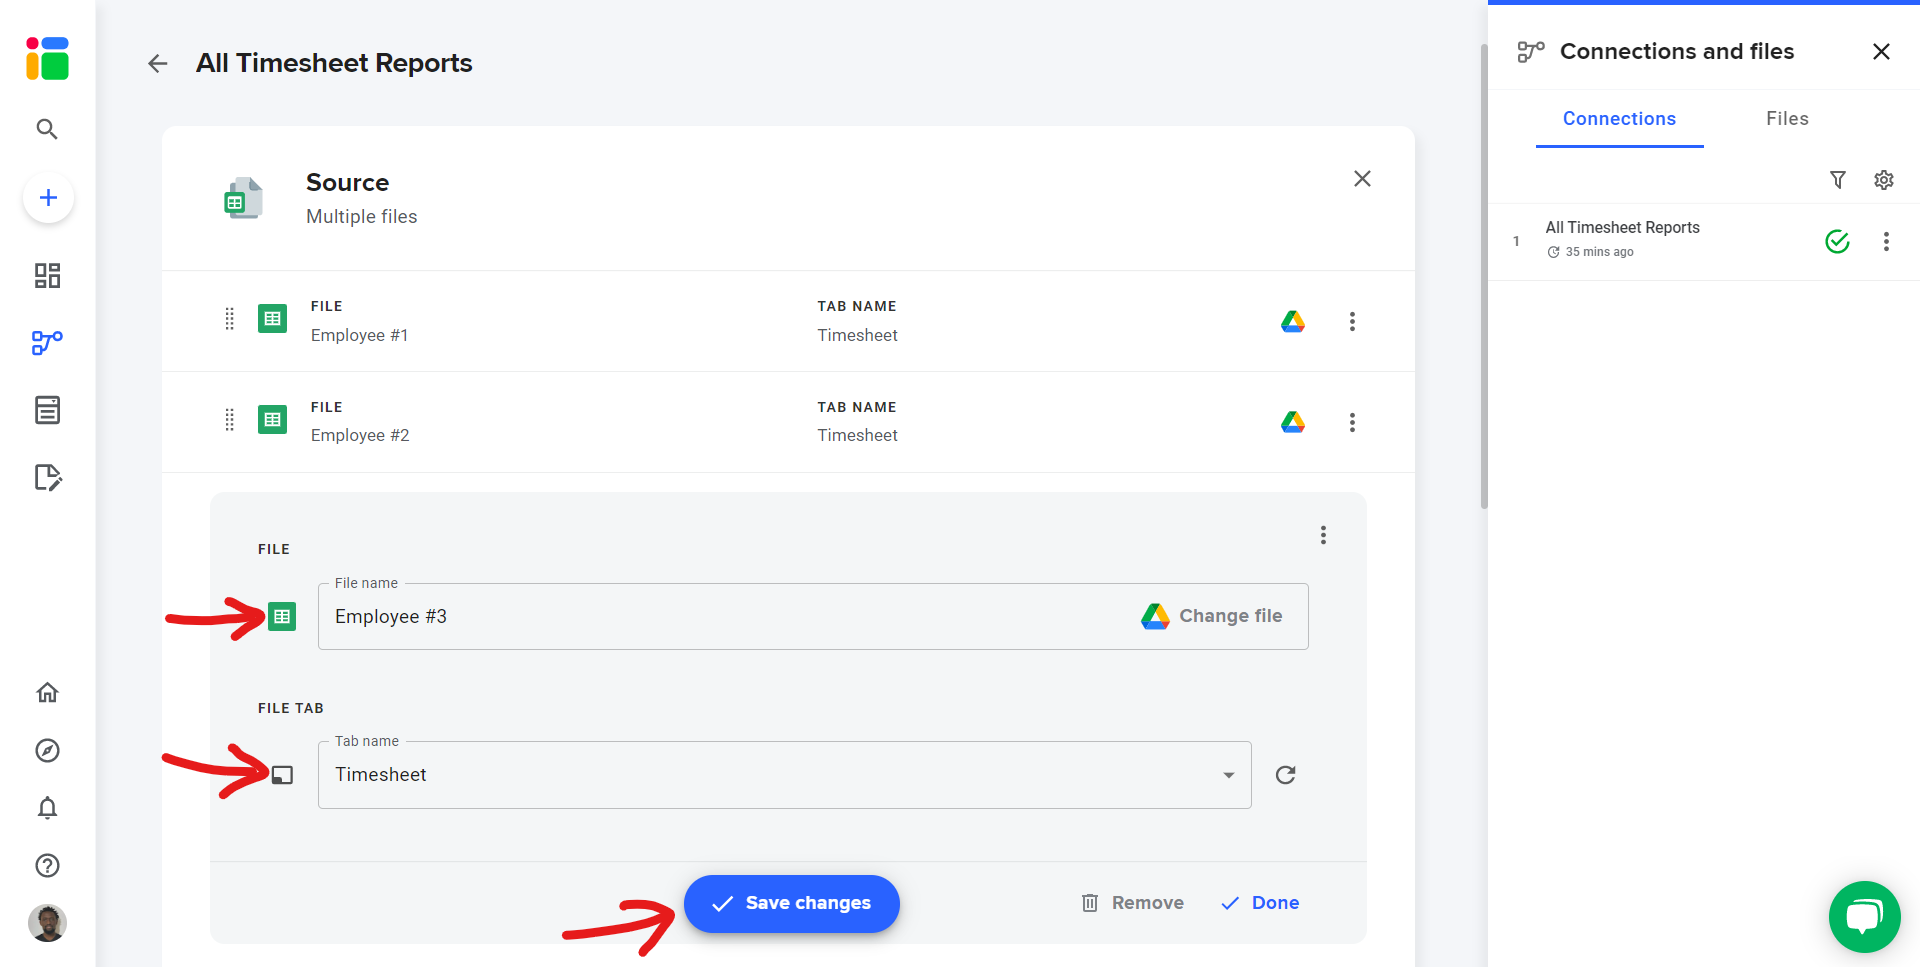
Under Source, you will see the two Employee files that are currently connected.
Click +Add another source file.
Click +Select file, locate the new employee file inside Google Drive, add it to the connection builder and select the Timesheet tab.
Click Save changes.
How to remove an employee sheet from the workflow
Next to the connection All Timesheet Reports click on the 3-dots menu (⋮) and select Edit.
Click on the 3-dots menu (⋮) next to the Employee timesheet you want to remove and click Delete.
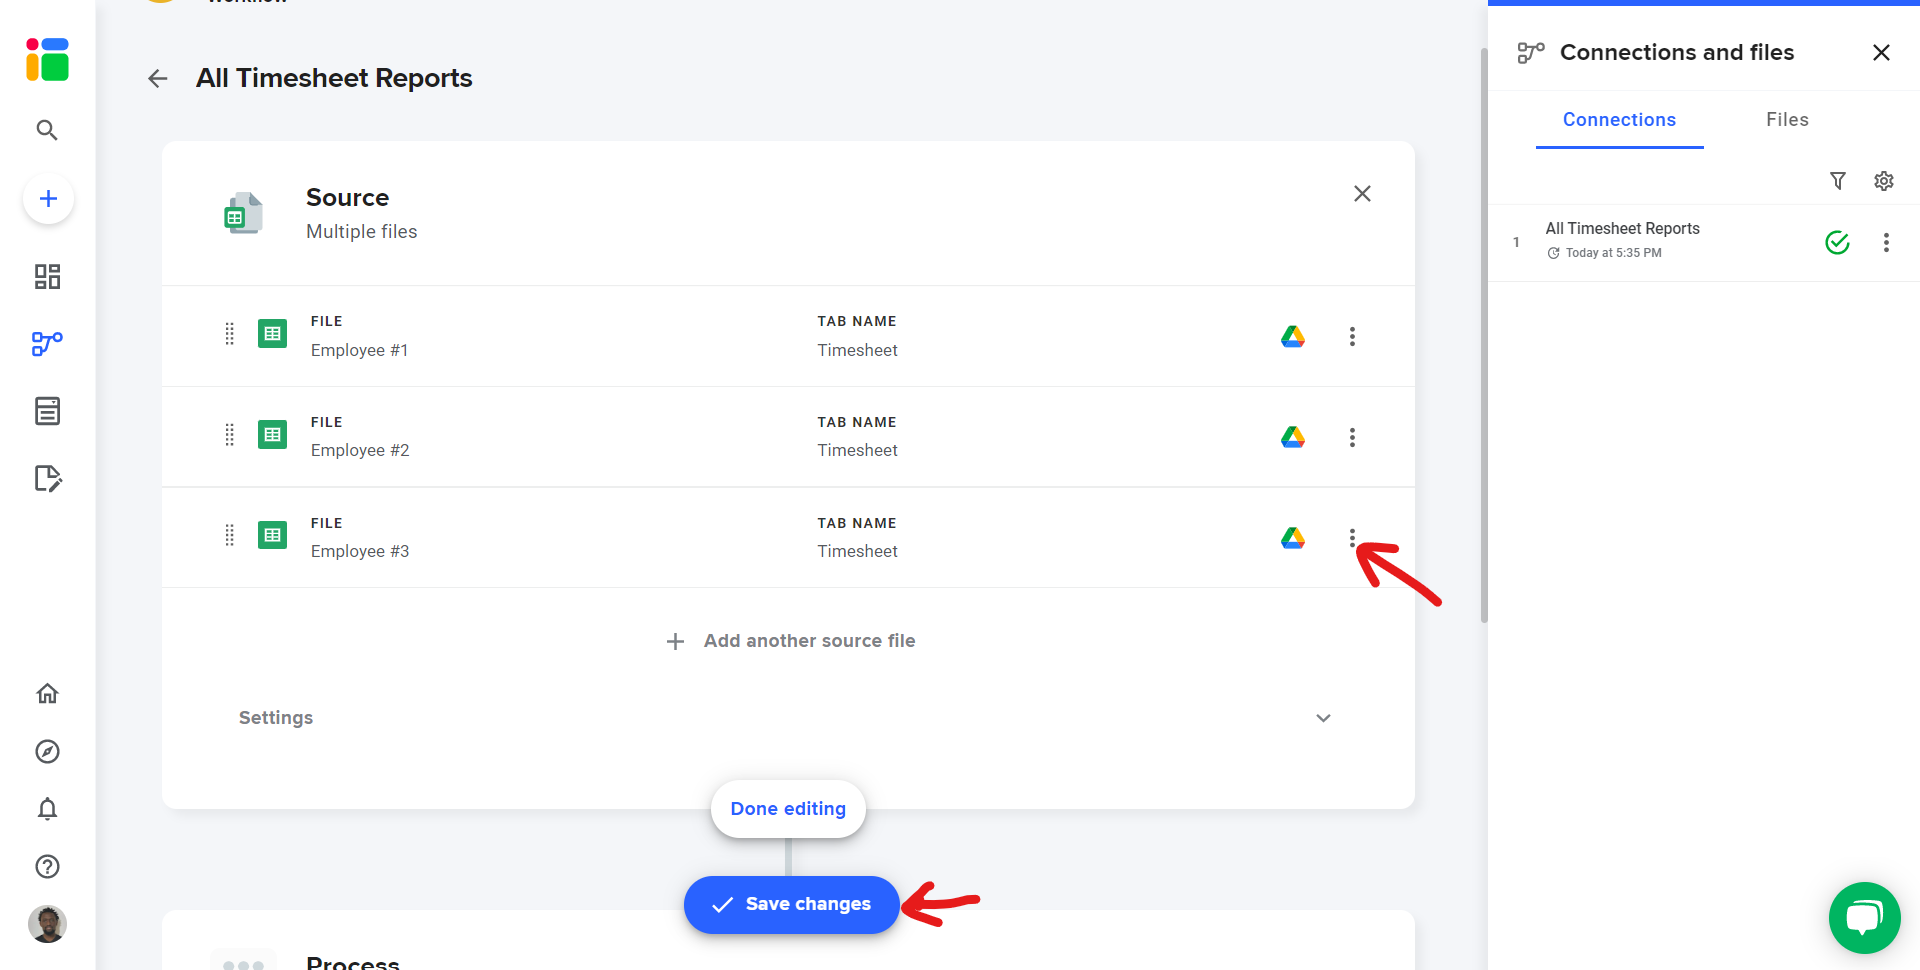
After deleting the connection, click Done editing and Save changes.
Update the workflow by clicking the run button on the Overview page.
Tip: You can change the connection to merge timesheets from a folder if you have many employees’ timesheets to copy data from. It’s easy to set up and easy to add or remove an employee whenever the size of your team change. Read more about merging with Sheetgo.