Objective: In this documentation, we aim to demonstrate how to effectively use Sheetgo’s VLOOKUP and Group configuration properties to automate and streamline data collection through forms.
VLOOKUP: [default:vlookup, key:"Key Field", range:"SheetName!Range"]
- default: Enables VLOOKUP to auto-populate the field.
- key: Field used for the lookup.
- range: Specifies the data range for VLOOKUP in the format
"SheetName!Range".
The VLOOKUP function is used to auto-populate form fields based on a user’s input. For instance, when a user enters a student’s Roll Number, VLOOKUP automatically fills in associated details like Student Name, DOB, and Class from a master data sheet, streamlining data entry and ensuring accuracy.
Group: If your form has a series of repeatable fields you can use the [grouped] configuration.
This configuration is used to allow multiple entries for fields that can have repeated data. For instance, in a student marks management form, which has fixed fields such as Roll Number, Student Name, and Class, and repeatable fields such as Subject and Subject Grade. The grouped configuration allows the user to submit multiple subjects and grades at once for each student, making it easier to manage and enter comprehensive student performance data.
**On your spreadsheet, this configuration would look like this:
Step 1. Prepare Your Master Sheet**
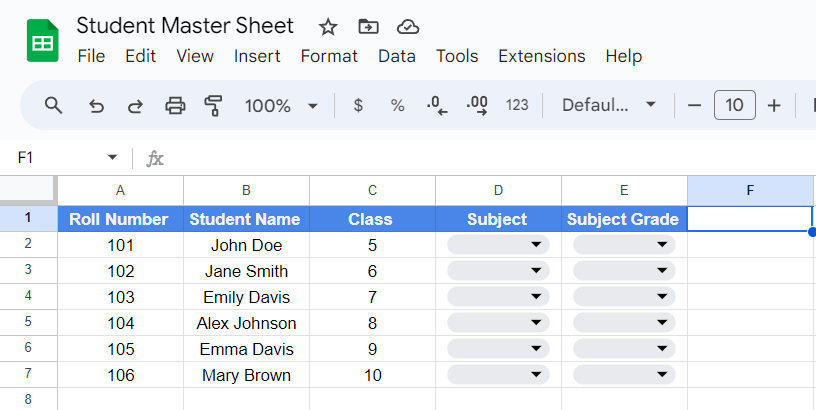
Create a Google Sheet that contains the basic information of all students. This will serve as your master sheet.
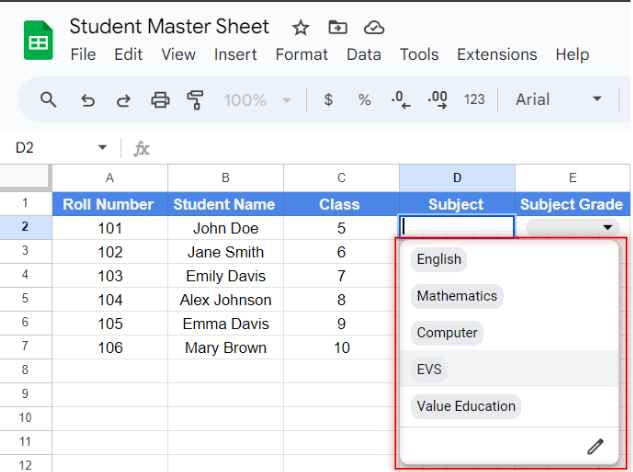
Set up the dropdown list options from data validation
Step 2. On your spreadsheet, the form configuration would look like this:
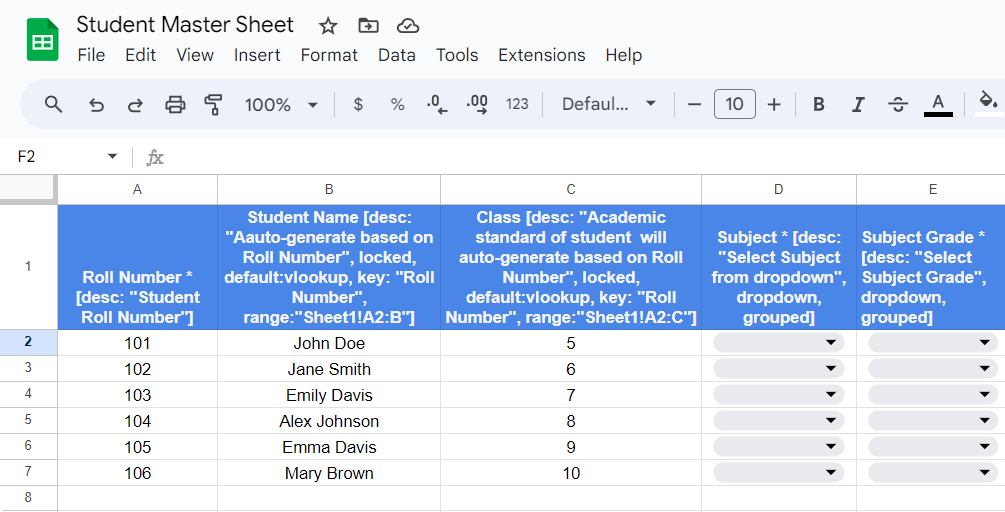
How the form works :
- The user enters the student’s roll number.
- The “Student Name” and “Class” fields auto-populate based on the roll number entered, leveraging the
VLOOKUP function.
- The user selects a subject from the dropdown.
- The user selects the grade for the subject from the dropdown.
- The
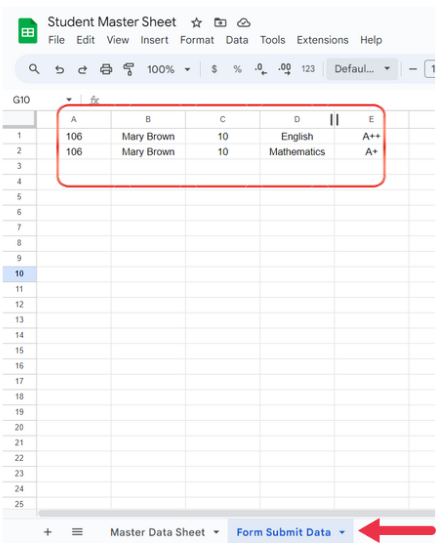
grouped configuration allows the user to add multiple subjects and grades for the same student in one form submission. Each combination of subject and grade will generate a new row in the spreadsheet, with the student’s roll number, name, and class repeated for each entry.
Step 3. Open a New Sheetgo Workflow, to create a form.
Choose the master sheet where you have configured the form and have the master data.
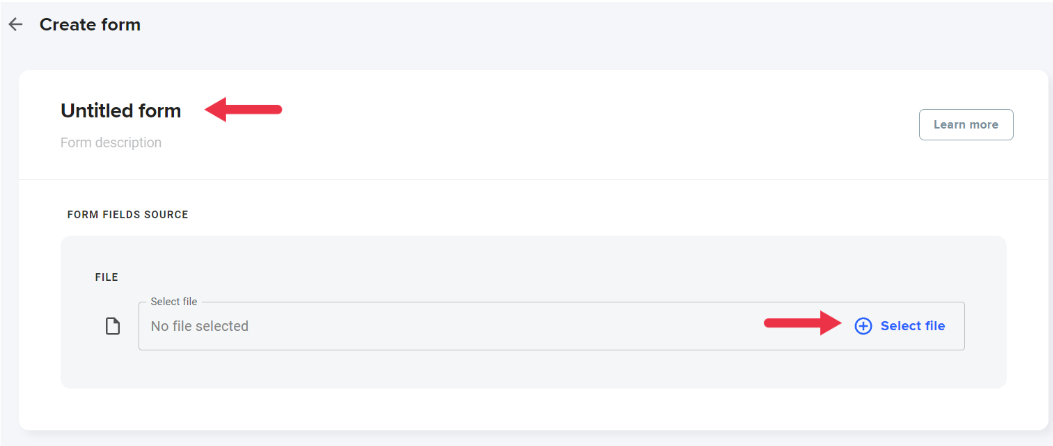
Step 4. Preview the Form
After selecting the master sheet, a preview of the form will be displayed. Review the form to ensure all fields are correctly set up.
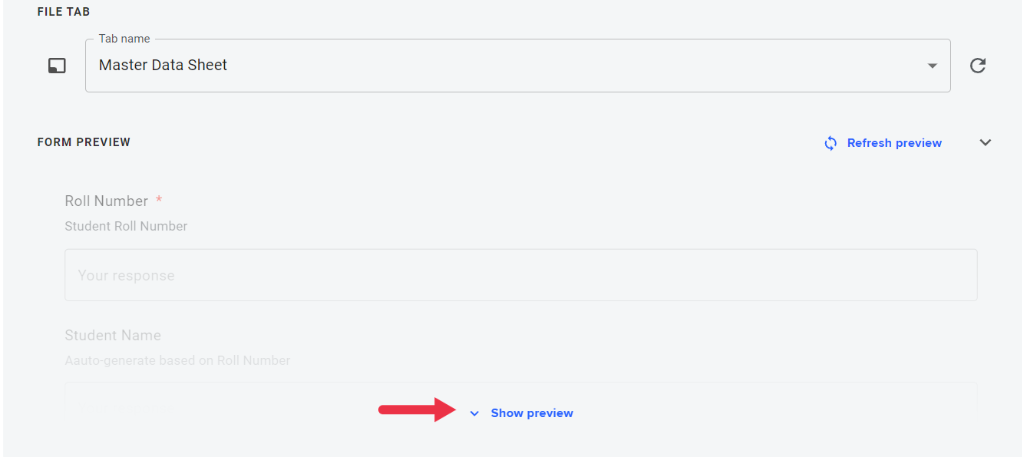
Step 5. Toggle Off “Response Destination Same as Source”
Toggle this option off to change the destination of form responses. Choose another sheet or create a new tab in the same sheet to store the response data.
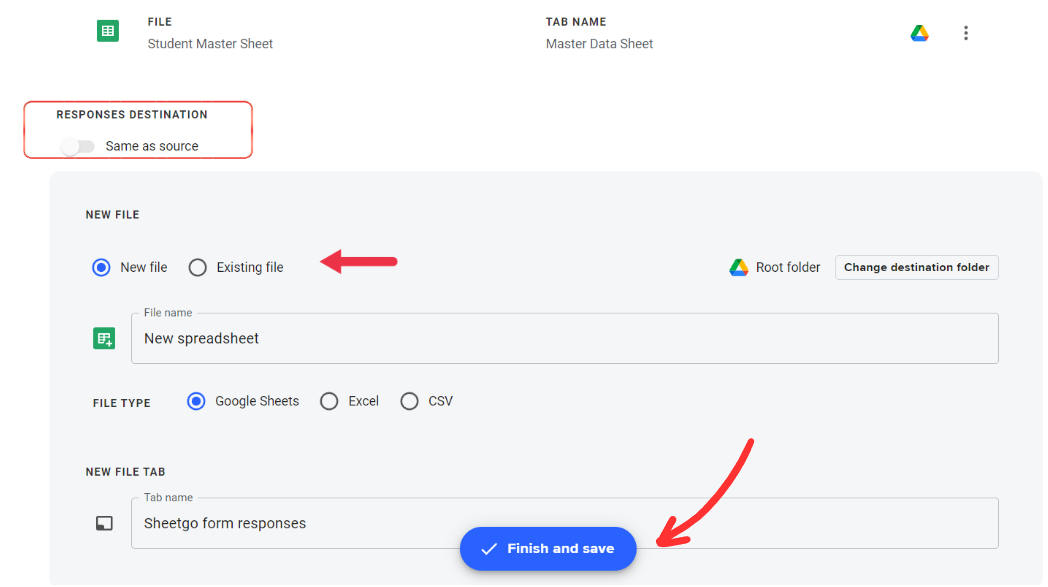
Here’s how the response data will show up on your selected destination sheet.
